Compute > GPU Instance > Console User Guide
Enabling GPU Instance
To enable GPU Instance, you need to go to Compute > GPU Instance and request creation of the instance first.
Click Select Service > GPU Instance.
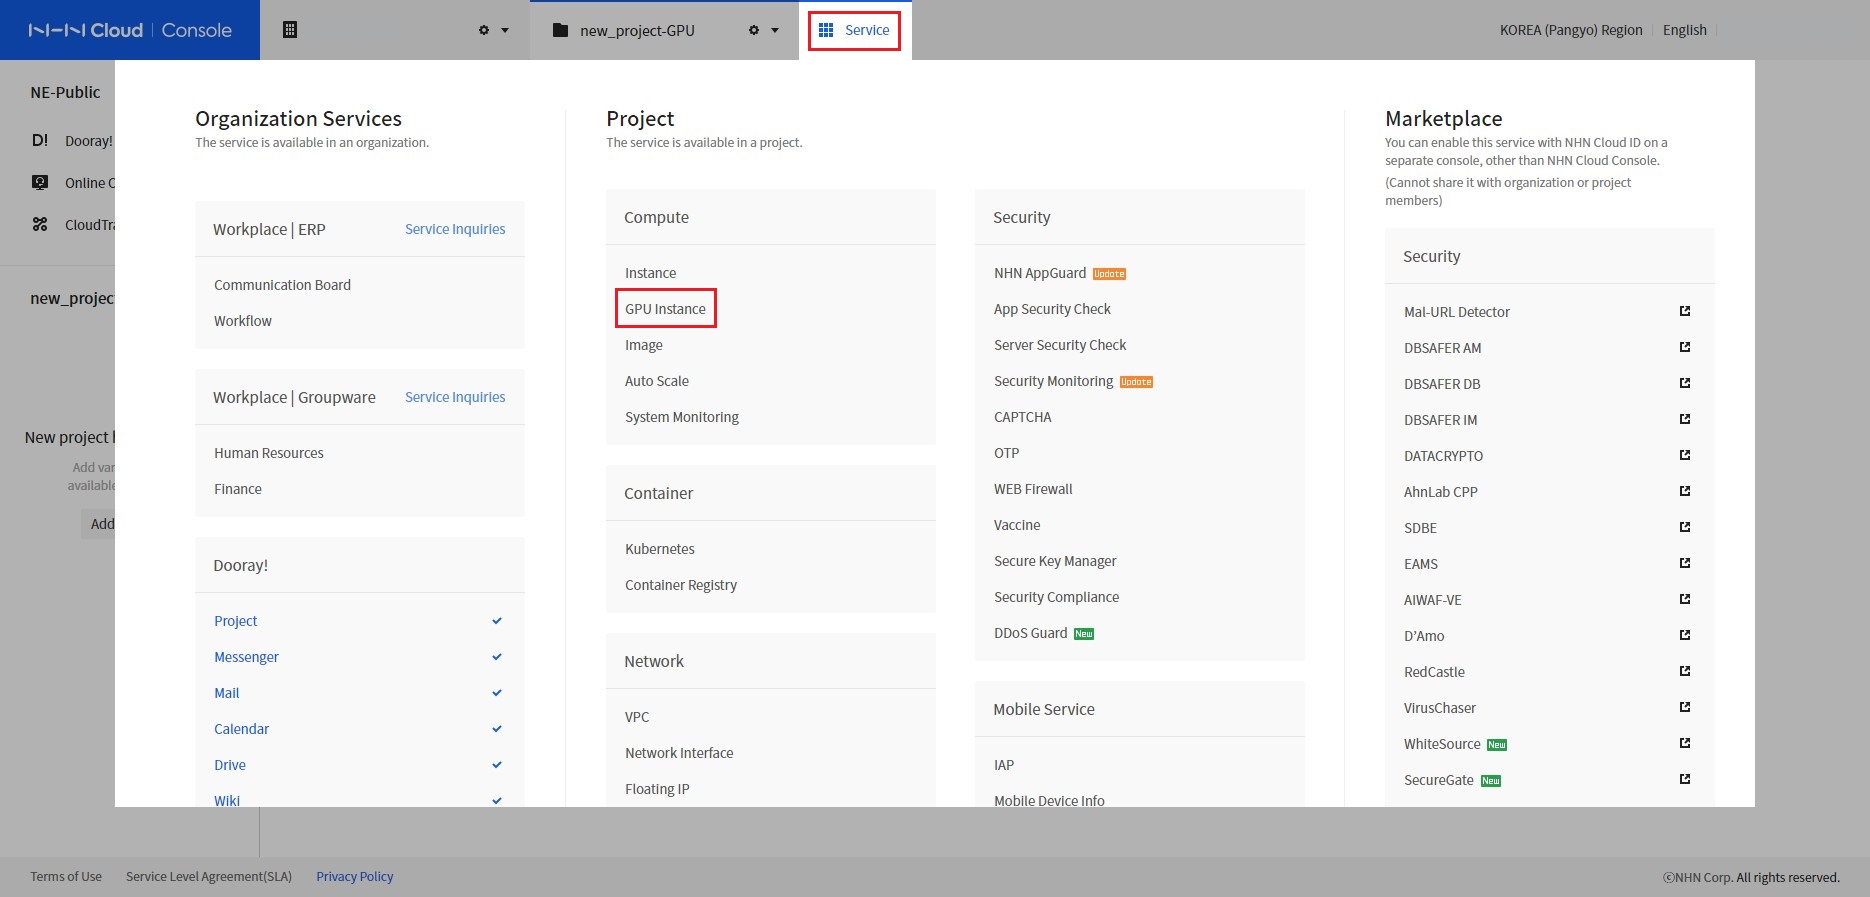
[그림1]
Click the Confirm button in the Service Activation popup.
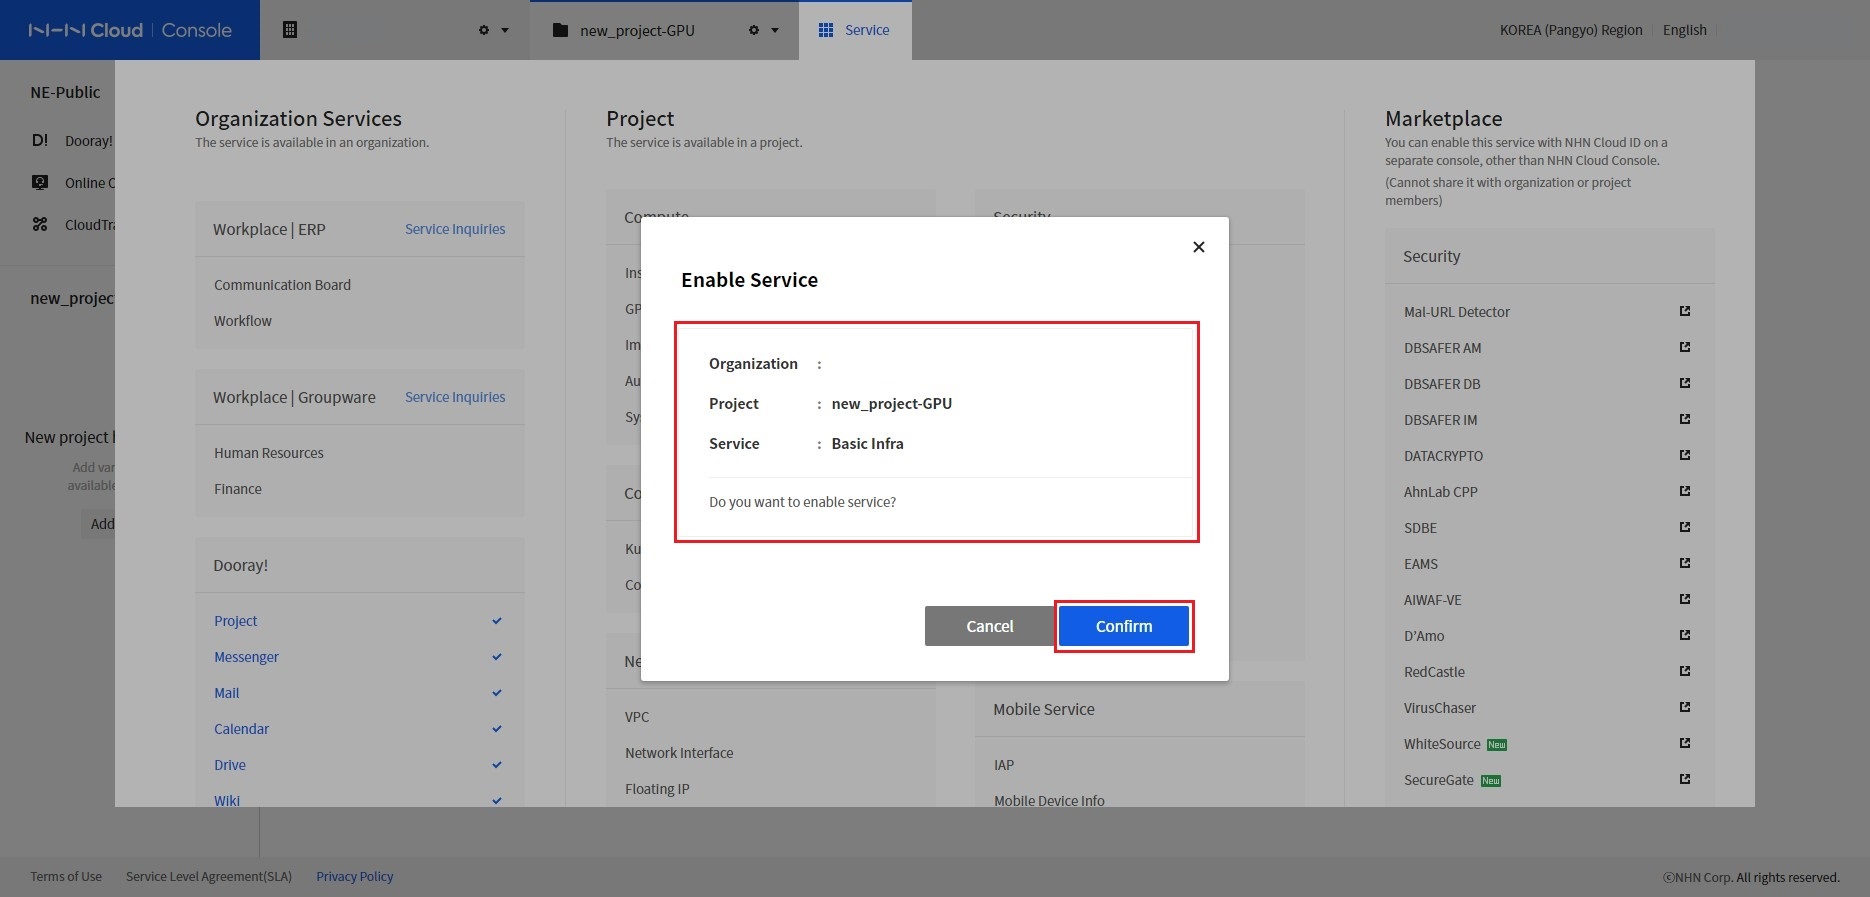 [Figure 2]
Requesting GPU Instance creation
Go to Compute > GPU Instance and click the Create button in the Create GPU Instance popup.
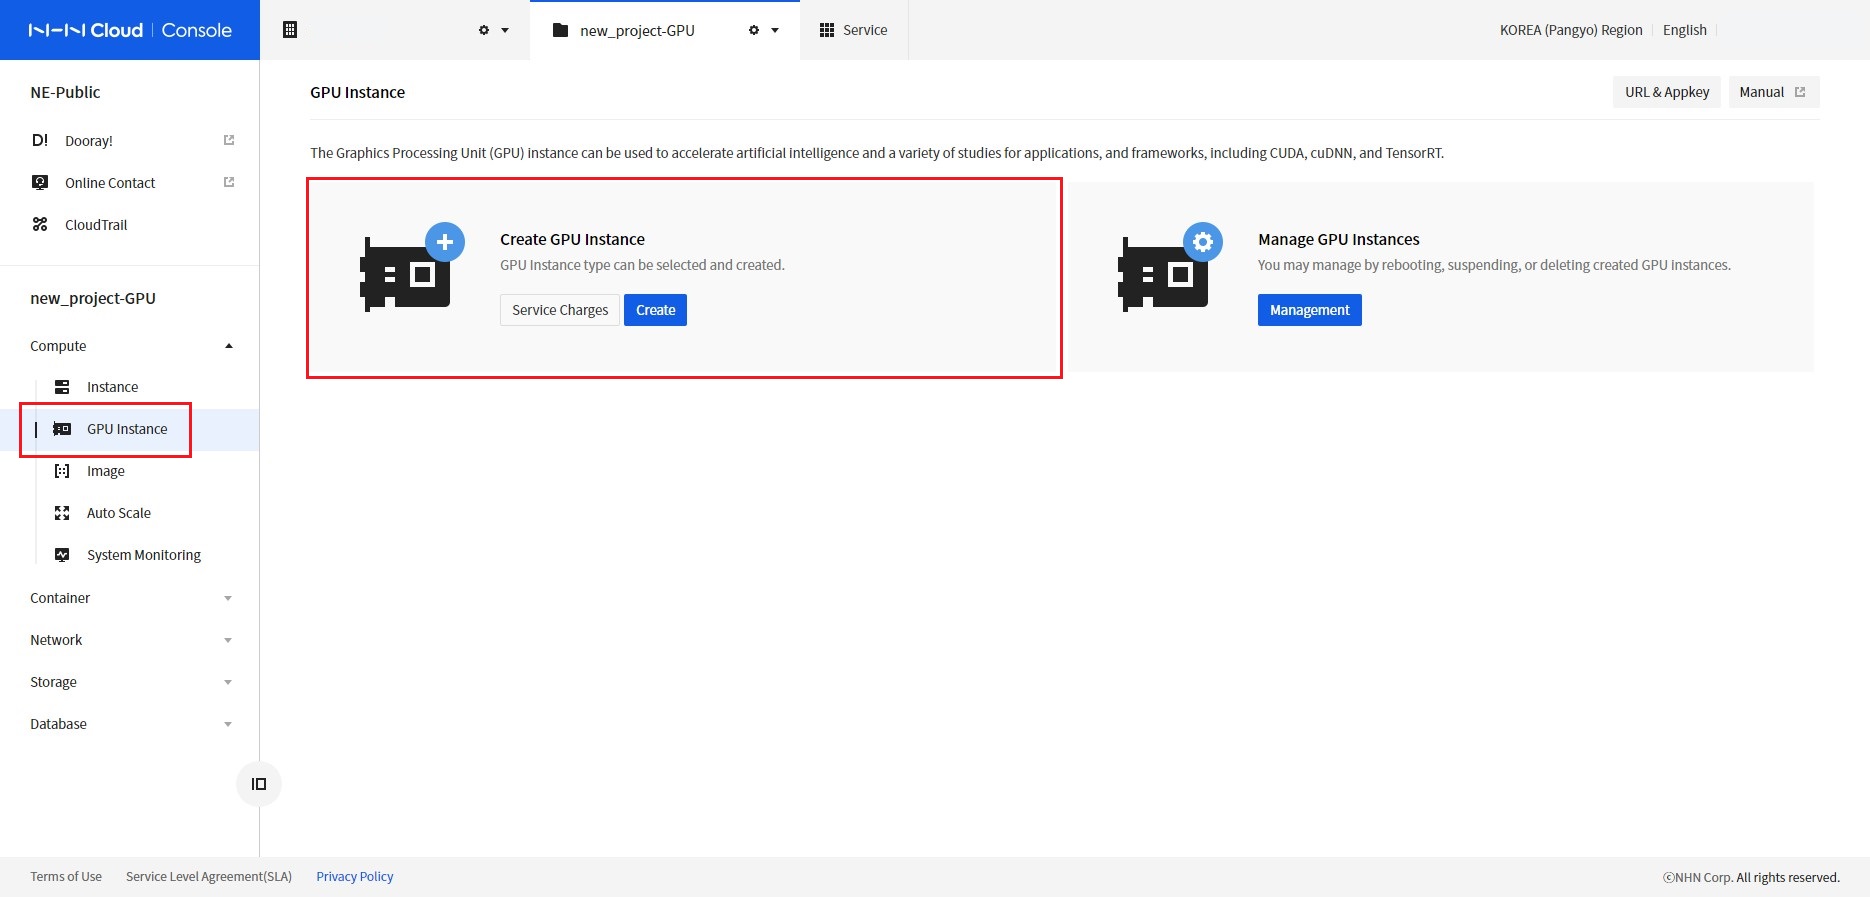 [Figure 3]
Check the OS image information to create a GPU Instance.
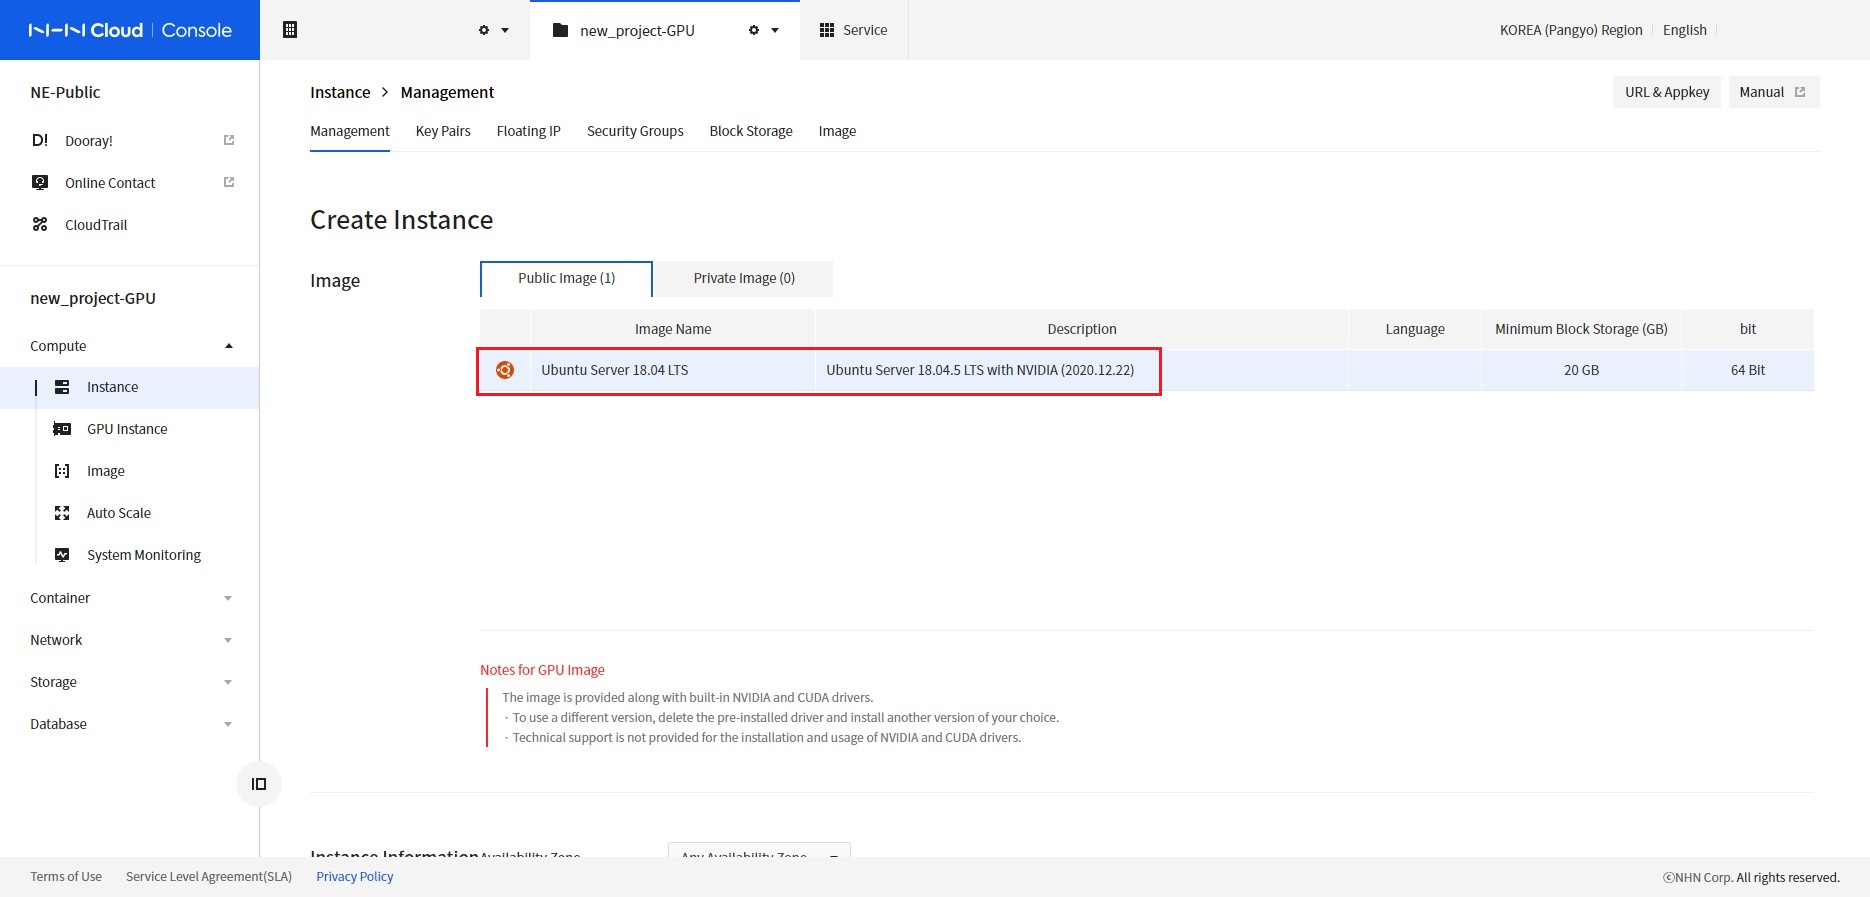 [Figure 4]
Select the instance type to create.
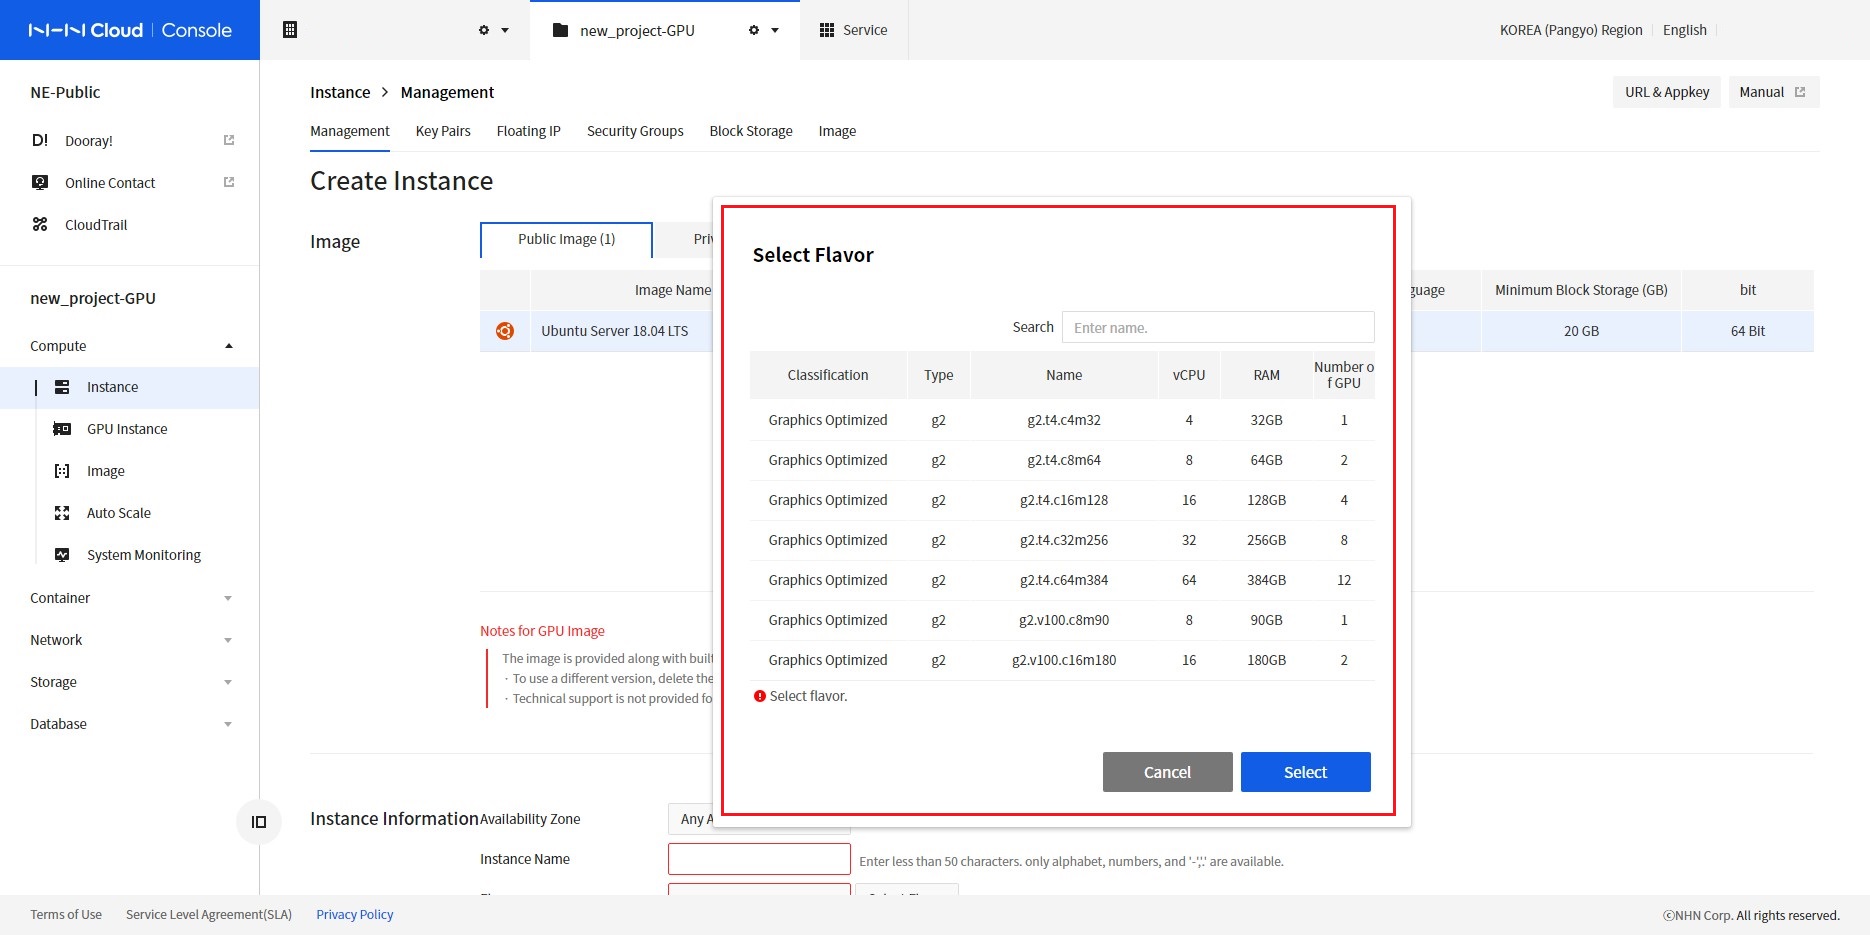 [Figure 5]
The rest of the process is the same as creating general Instances.
For more information on creating instances, see Instance Overview.
GPU Instance Information
GPU Instance Specifications per Type
| Instance Type | GPU model | GPU | GPU memory | vCPU | Memory |
|---|---|---|---|---|---|
| g2.v100.c8m90 | V100 | 1 | 32 GB | 8 | 90 GB |
| g2.v100.c16m180 | V100 | 2 | 64 GB | 16 | 180 GB |
| g2.v100.c32m360 | V100 | 4 | 128 GB | 32 | 360 GB |
| g2.v100.c64m720 | V100 | 8 | 256 GB | 64 | 720 GB |
| g2.t4.c4m32 | T4 | 1 | 16 GB | 4 | 32 GB |
| g2.t4.c8m64 | T4 | 2 | 32 GB | 8 | 64 GB |
| g2.t4.c16m128 | T4 | 4 | 64 GB | 16 | 128 GB |
| g2.t4.c32m256 | T4 | 8 | 128 GB | 32 | 256 GB |
| g2.t4.c64m384 | T4 | 12 | 192 GB | 64 | 384 GB |
How to Access GPU Instance
Once the instance is created, access the instance using the credential.
How to access Linux GPU Instance
After creating the instance, access it using SSH. The instance must have a Floating IP connected and TCP port 22 (SSH) allowed for the security group. Access the instance using the SSH client and the configured key pair.
For more information on connecting to SSH, see How to Access Linux Instance.
How to Access Windows GPU Instance
To access a Windows server, select a Windows instance to access from the NHN Cloud console. Click the Confirm Password button on the Access Instance tab of Instance Details to confirm the password configured in the Windows server.
Click the Connect button next to Confirm Password to download the .rdp file containing the configurations for accessing remote desktop and run it to access the Windows server. The ID of the Windows server is Administrator and the password is the one checked by the NHN Cloud console.
For more information on connecting to RDP, see How to Access Windows Instance.
Checking GPU Information
Access the instance, execute the nvidia-smi command, and check the GPU information.
# Checking GPU Information
(Linux) shell > nvidia-smi
(Windows) cmd > C:\Program Files\NVIDIA Corporation\NVSMI\nvidia-smi.exe
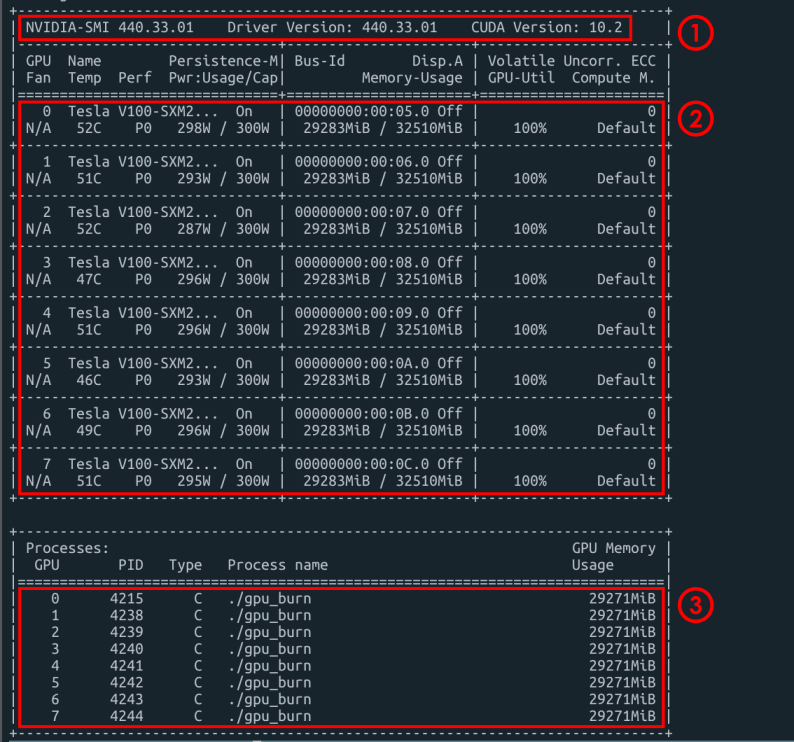 [Figure 6]
- Version Information
- NVIDIA Driver Version : 440.33.01
- CUDA Version : 10.2
- GPU Information
- Number of Available GPUs: GPU 0-7, (using 8)
- GPU Model Name: Tesla V100-SXM2
- Persistence Mode Status: Persistence_mode On
- GPU Temperature: Temp 52C
- Power Usage/Capacity: Pwr Usage/Capacity 298 W/300 W
- Memory Usage/Capacity: Memory-Usage 29,283 MiB/32,480 MiB
- GPU Utilization : GPU-util 100%
- Processes Information
- PID per GPU, Process Name, GPU Memory Usage Information
- Type Information
- C = compute = CUDA or OpenCL
- G = graphics = DirectX or OpenGL
Check CUDA version with nvcc command.
# Checking CUDA version
/usr/local/cuda/bin/nvcc  --version

nvcc: NVIDIA (R) Cuda compiler driver
Copyright (c) 2005-2020 NVIDIA Corporation
Built on Thu_Jun_11_22:26:38_PDT_2020
Cuda compilation tools, release 11.0, V11.0.194
Build cuda_11.0_bu.TC445_37.28540450_0
Difference between Normal Instances and GPU Instances
- The specifications of GPU Instance cannot be changed.
- The NVIDIA and CUDA versions are updated without any announcement.